Setting up my Pihole with Google Fiber
Other people have written why pihole is cool and good and why you should get it.
Other people have also written guides to setting them up.
I’m just going to write about my set up experience because:
- It was way easier than I expected to work with google fiber.
- I encountered some brief snags which made my instructions not exactly correct for me
My supplies
Firstly, the hardware
- A raspberry pi zero W
- The official raspberry pi power supply
- Given the lack of power hungry peripherals, under powering with a normal micro-usb charger that you already have would probably be fine. But if you are going to buy any charger for it, I do recommend this one due to the relative low price/high quality which can be hard to get with chargers. As of writing, they cost about $8.00 each.
- A 2GB microSD card
- WARNING: this is now probably a bad choice. Go with a 4GB card. However, I did make it work with a 2GB card, so if you already bought a 2GB card based on an outdated guide, and got stuck when the raspbian image was too big, keep reading.
- A computer which can:
- Read/write to micoSD cards
- ssh onto the raspberry pi when it’s set up
Information/Environment stuff:
- Google fiber as my internet provider
- admin login to that account.
- My wifi network login info
Steps & Snags
I followed these instructions which were generally very great.
There were a few snags, as well as some easier options I found.
The microSD card
Firstly, that guide makes a big deal about 2GB being more than big enough for the microSD card, which was accurate at the time. However, the raspbian image has grown and now takes up some more space. So if you have not already obtained your microSD card, definitely get a 4GB or 8GB one.
There is a somewhat not-great workaround for this, however. If you already got the 2GB card, you can go to this page and find a raspbian image from around the time that article was written.
It’s much preferable to get a larger card and get an up-to-date OS image, however, for all the security updates. But this does allow you to finish setting up so you can order your replacement card while getting the benefits of pihole.
Logging into the wifi
The guide I followed told me to buy a raspberry pi w but then told me to plug my raspberry pi into the router via an ethernet, which wasn’t going to happen. (I bought the W model to avoid that!)
Thankfully, I did not need to connect the pi to a monitor and keyboard, as I was fearing I would need to. I followed this guide.
If you’re unsure which of the file formats to follow, I’d recommend trying this one:
country=US # Your 2-digit country code
ctrl_interface=DIR=/var/run/wpa_supplicant GROUP=netdev
network={
    ssid="YOUR_NETWORK_NAME"
    psk="YOUR_PASSWORD"
    key_mgmt=WPA-PSK
}
Often, configuration systems ignore configuration items which they don’t expect to see. Therefore, selecting the max config can be the most likely way to ensure your system works as expected.
This is why I included the login info at the beginning. If you are going to set up a pihole for someone else and you’re setting up the microSD card ahead of time, you’ll want to have that wifi info when you flash the image and prepare everything else on the microSD card.
Finding the initial IP address of the raspberry pi
This one’s an opportunity to make things easier. If you’re also working with a google fiber account, you have an easy option to find the IP address. After the pi starts up, you can see it on your admin page as a new device. It should be named something like raspberrypi, and it might take a bit for the pi to completely finish booting up and connecting to the wifi. Try refreshing the page after a few minutes if you still don’t see it there.
This image shows me after I’ve reassigned the ip address, but it’s the same way yours should look to.
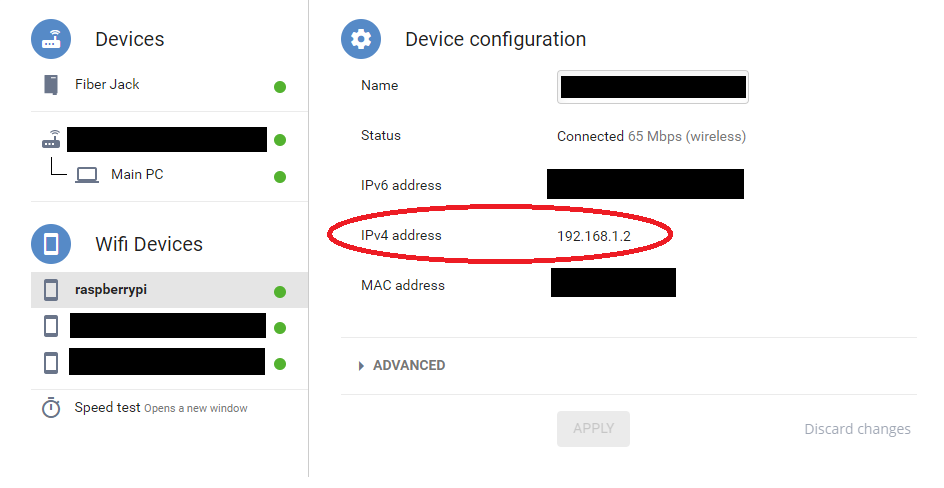
Once you see it, you can just use the IPv4 address that the admin UI shows you.
Picking a static IP address
That guide essentially says “If this is too hard, skip it and worry about it later.”
If you also have Google Fiber, it should not be too hard, even if you literally understand nothing about this.
I tried to google stuff about how to determine what range of IP addresses were reserved, figuring there were some commands where I could query it from the command line. I found a lot of information which did not help me.
It was an accident that I realized the web UI for google fiber has exactly the info I was looking for, laid out pretty clearly.
Following fiber.google.com -> your wifi network -> Advanced -> Addresses -> DHCP Start/Stop Address
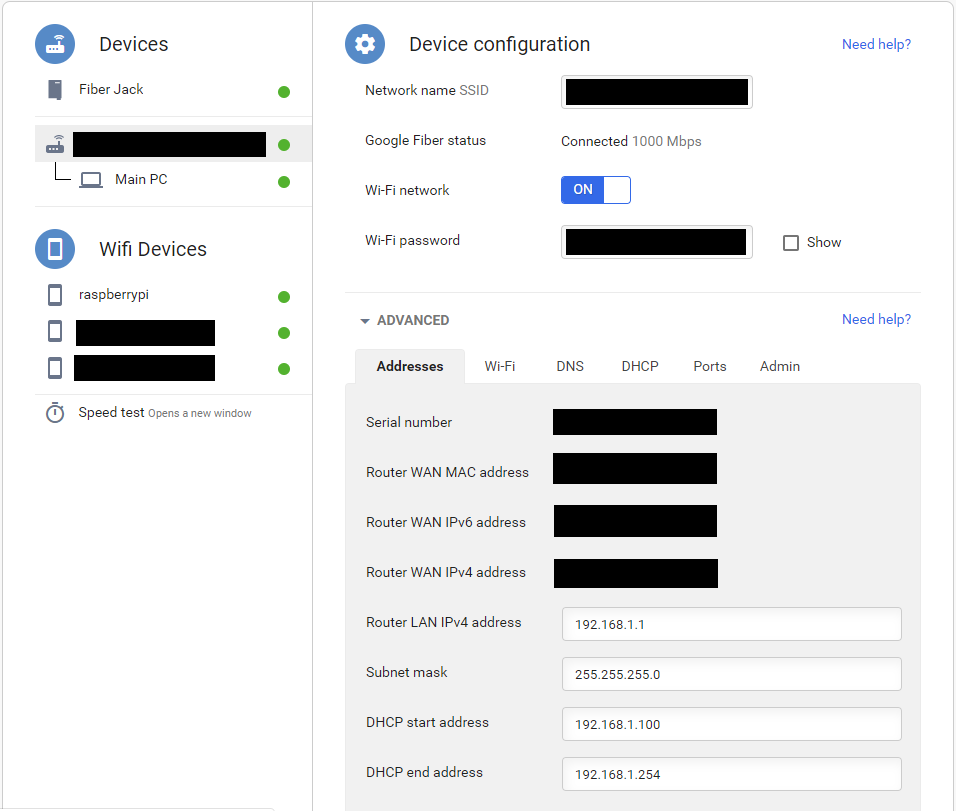
That’s all the info you need from the admin page for now. Assuming no one on your system has had reason to change those values, it’s very likely to be the same as what mine were: 192.168.1.100 and 192.168.1.254
The last number in the sequence is the number you would want to change to choose the static IP for your pihole. You don’t want any numbers in that DHCP range, so nothing between 100-254. Because of how IP addresses work, you also shouldn’t try to go above 254. That leaves you 1-99, which is more than enough for all the static IPs you’ll need.
My instinct was to go with 192.168.1.1, which was a poor instinct, because the google fiber box uses that one already! I had to reconfigure my pihole after realizing. (Thankfully, it was just running pihole -r and waiting again) To be absolutely sure to avoid anything like that, go to that IP address in your browser like it’s a normal url before selecting it. If it connects to something, that’s a bad IP address because it’s already being used! If you’re on Chrome, you want to see an error similar to this one:
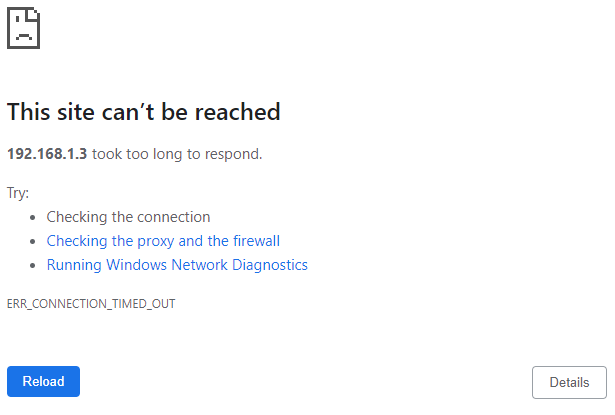
If you get that error and the IP address is outside the DHCP address range mentioned above, you should be good to use it. I ended up choosing 192.168.1.2, and you’ll probably be safe to do the same.
Setting the pi as the DNS server
Another easy option is available here. You do not have to figure out whether google gives you admin access to the router itself. You can just go to the admin page like before.
From your network -> Advanced -> DNS
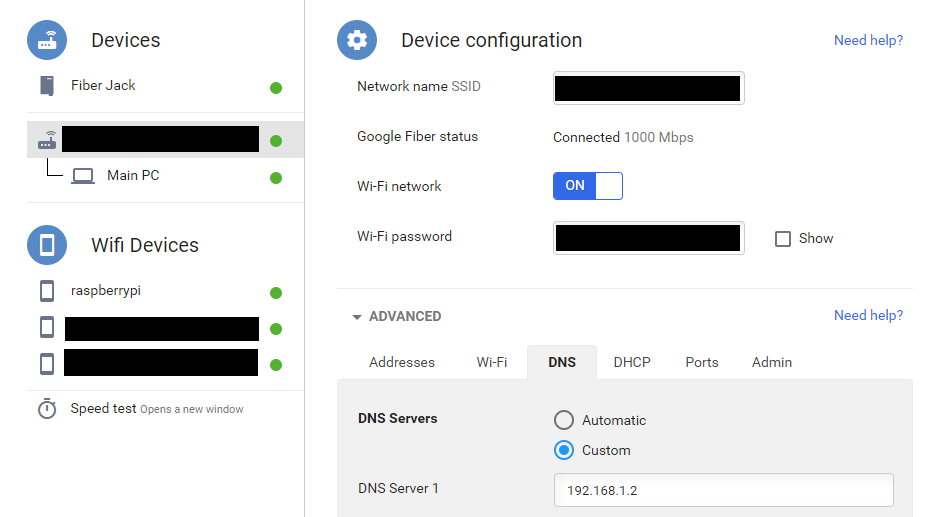
You should find a radio button option for ‘Automatic’ or ‘Custom’. Click custom and put the static ip you chose into the DNS server one. Feel free to leave the other two blank.
After that, I went to admin and restarted the router box. I’m not sure it was actually necessary to get it to work, but it’s not going to hurt, regardless.
Questions?
If you’re setting up the pihole, especially with google fiber and you have any questions, please feel free to comment below.
Comments